Tuesday, December 17, 2013

Get Your Kitchen Ready for Christmas


Christmas is coming soon! This is the time of the year when life gets a lot busier. You may be thinking of potlucks and dinner parties and start to feel the giddy anticipation of hosting a festive-get together. Despite our high expectations, holiday stress often comes uninvited. But keep in mind there is a better way to make Christmas enjoyable and less stressful. The secret: plan ahead.


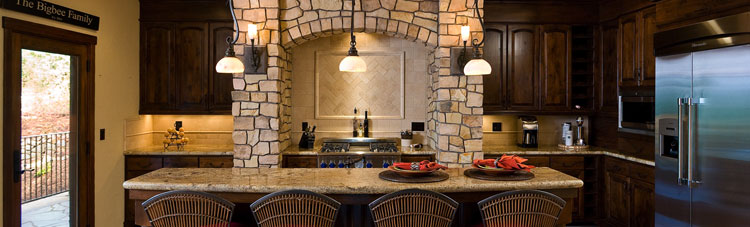
Your guests will be spending more time in the kitchen so it’s important to get organized and clean every nook. Here are some of the ways you can make your kitchen ready to take on guests while preventing major cleanup later.


Remove clutter from countertops. Get rid of mail, bills, and recipe books lying around. Keep paperwork off your kitchen and make sure all surfaces are sparkling clean.


Clean the microwave. Some of your guests might offer to help you warm up food. we’re pretty sure you don’t want them to see a food-splattered microwave.
Check your refrigerator. Your fridge will be opened and closed continuously and will soon be filled with heavy dishes. The door handles and gaskets should be tight, cold air vents must be clean, and lights should be working properly.
Stock your kitchen properly. If some of your guests have allergies or are vegetarian, vegan, or gluten-free, take these into consideration and prepare dishes accordingly. Aside from alcoholic drinks, make sure to offer other beverages as well.


Create a cooking schedule. Prepping ahead of time will help you keep things organized during the holiday celebration. You can chop some of the veggies and store them properly. Potato dishes and casseroles can also be put in a baking pan ahead of time.


Disinfect trash cans. Clean them before your expected holiday party. Wash them with a garden hose and dish soap and disinfect with a cleaning spray. Keep extra trash bags, too.


Check your dishwasher. Aside from your fridge, the dishwasher will also be used a lot after the dinner party. Make sure it’s running efficiently and the drain is free of any residue. Check if there are broken glasses or lost utensils at the bottom. Remove any gunk by wiping off the rim of the door.


Get your serveware ready. Take an inventory of supplies you need - cookware, serveware, cooking oils, canned goods, and other pantry necessities. Have your knives sharpened for the honey-baked ham so you can serve it to your guests in an instant. Get your plates, utensils, and cloth napkins ready.


Take precautionary measures. Make sure everything is childproof. The kids may hang around and play. Plugs should be covered, lamps and other fragile items must be put off the table edges. Double check your smoke detector and CO2 detector batteries, and replace them if necessary. Have a fire extinguisher ready, too. Complete your first aid kit so you're always ready to respond to minor medical emergencies.


Did we miss anything in the list? Share your best holiday tips in the comments below.


From everyone at Milan Stoneworks, we wish you a very Merry Christmas and a wonderful New Year. We hope you're all having a fantastic holiday!

Tuesday, December 3, 2013

5 Secrets to a Great Bathroom Design


When it comes to planning your bath, focusing on function will help you simplify and carry out the most basic daily routines. These efficient ideas will allow you to create a beautiful and useful grooming space tailored to your needs:
  • Cosmetics and personal items should be placed where you need it without having to stoop or strain. This will make it easier for you to get everything in a single area and move around the room to complete your morning routine.
  • Select high-quality fixtures and accessories for your bath. Moisture can create permanent rust spots on cabinet shelves so make sure you invest on a rust-free aluminum material for your grooming station.
  • Think about the space you have and get the right size of mirror to fit in your space. Position it properly where you can see yourself without having to lean or bend. A mirrored medicine cabinet is a great space saver as well. Aside from the functional mirror, you can place all the items you need, keep toiletries organized, and cut down on visual clutter. Consider installing a locking compartment for your prescription medications to keep them out of reach of children.  There are also medicine cabinets with adjustable shelves for a more customized and organized storage. You can even find one that is customized for left-handers.


  • Proper lighting is important in your grooming station. Multiple light sources at different angles are recommended for better illumination. Choose bulbs that give off soft light from the middle of the color spectrum and use a combination of ambient and task lighting to help balance light intensity.
  • Bathroom vanities come in different styles and sizes but the most important thing is to choose the right one that fits your space perfectly. Whether you wish to sit or stand as you groom, your vanity should be able to offer convenience.
Thinking of upgrading your bathroom and refreshing it with a new vanity? Let Milan Stoneworks install it for you! We can design custom bathroom vanities that suit your space, style, and taste. Call us today at 503.232.6206 or visit www.milanstoneworks.com for more details.

Tuesday, November 19, 2013

Simple Kitchen Makeovers


The kitchen is definitely the busiest room in the house as it serves a lot of function - from cooking to eating, entertaining, and family gatherings.

Although a kitchen remodel is one of the most expensive home improvement projects, it is a great way to give dull kitchen a new life. Many homeowners choose to repaint walls, change cabinet hardware, and upgrade appliances to freshen the look. Here are more options for simple upgrades:

Redesign the work triangle
Creating an efficient kitchen mainly depends on layout options for a perfect work triangle. The kitchen work triangle connects the three main work areas - the sink, the range, and the refrigerator. You don't want these cramped, blocked, or too far apart.

Read more about kitchen layouts and work triangles

Create a space for your kids
Consider adding a few stools in the kitchen where your kids can have an informal place to eat. Make sure you keep snacks and beverages within their reach.

Modify existing cabinets
Sturdy wood cabinets go for a long run. You can also replace the knobs, pulls, and hinges and consider a fresh coat of paint to brighten up old cabinets. For a brand new look, refacing can be done or you can change the doors if possible.

Make appliances look new
You can simply replace worn-out stove knobs, burner plates, and glass cooktops which can be ordered from the manufacturer. If you want to show your DIY prowess, you can transform outdated appliances including your fridge, dishwasher, and oven using cabinet fronts, specialty appliance paint, and stainless steel films.

Give an old floor a new life
Refinish hardwood floor and add stenciled borders or stain it with the color of your choice. To bring back the original luster of stone flooring, consider hiring a professional.

Spruce up your counter
There are many ways where we can help revamp your kitchen with new countertops. We can professionally polish your existing solid surface or stone countertop to remove marks or install a brand new countertop you’ll surely love. You can also replace your sink, faucet, and backsplash to complement the overall look.

Do you have a dream wish list for your kitchen? If you can dream it, we can make it! Visit www.milanstoneworks.com today or call 503.232.6206 for a no obligation quote for your new kitchen.

Tuesday, November 5, 2013

How to Choose the Right Kitchen Faucet


If you’ve been reading our blog over the past few months, you probably know your options for countertops and some great picks for kitchen islands, sinks, and backsplashes. In this post, let’s talk faucets.


Whether you are replacing an old faucet or selecting a new one for your remodeling plan, there are different factors to consider. Because faucets are one of the most frequently used fixtures at home, they should be selected to complement your kitchen sink.

So what constitutes to a good faucet? Before the water starts to flow, take a look at this guide on getting a high quality faucet:


  • When replacing an existing faucet, make sure the new one has the same number of holes in the deck of the sink. For faucets with integrated handle and spout, one hole is needed for the handle/spout and another separate hole for a sprayer. Traditional faucets usually have three holes for the taps and spout and a fourth for a sprayer. For a new sink, you can put any holes you need to fit in the faucet of your choice.


  • Most faucets have either one handle that you can turn directionally to adjust water temperature or two handles to mix in hot and cold. Other one-piece faucets have a handle attached to the faucet unit or are placed to the side in the same position of the sprayer. A variety of faucet handles to choose from include the classic rounded X-shaped tap and an easy-access lever shape.


  • Consider a sink sprayer to wash down any collected food waste from the sink. Some newer models have sprayers integrated right into the faucet itself. You can also add a soap dispenser which is mounted alongside or near the spray.


  • A standard kitchen spout rises only a bit higher than the body of the faucet. If you use bulky pots and pans, you should get a tall, curved neck faucet to easily rinse big pots thoroughly.


  • You may opt for a water filtration faucet mounted directly to your sink and have it attached to the faucet itself with a built-in filtering mechanism. Think about the maintenance requirements as well.


  • Some faucets can be mounted from the top while others are from the bottom. There are different types of faucet mechanism - ball valve, ceramic disk, compression valve and cartridge. Choose whichever appeals to you as it won’t necessarily make a big impact in functionality. Take note that some are easier to repair than others.


When carefully selected, a good faucet can offer exceptional day-to-day convenience in the kitchen. Look for quality features, style and finishes that matches your overall design.


Come and visit Milan Stoneworks today - we’re glad to help you on your next kitchen remodeling project!

Tuesday, October 22, 2013

How to Create a Halloween-themed Kitchen


Halloween is fast approaching! It’s actually one of the most exciting times of the year. You can dress up in fun costumes, decorate your pumpkins, and enjoy devilishly delightful food. One of our favorite rooms to make over is the kitchen – where the preparation for the Halloween party takes place. 

Here are some ideas to up the spook factor in your home without all the extra clutter:
  • Leave your kids in awe by switching out some orange bulbs creating a nice effect on the mirrors and lamps, just like what Vel Criste did. She bought everything else from the Dollar Store on clearance. She wrapped a creepy black fabric around the chandelier and window. Every other piece she either had on hand or bought on sale.
  • If you want a nostalgic appeal of old-fashioned Halloween for a vintage party flair, you can add traditional decors like images of black cats, carved pumpkins, and other vintage decor. We also loved this kitchen when we first saw it on Houzz.
  • Decorate a small area in your kitchen with piled pumpkins in gray/green and white to create an elegant display, like this countertop.
  • Halloween decor is meant to be classy, fun and cheeky. Shelley Smith made almost everything on her own and others were snagged from thrift shops and dollar stores. The tableware is simple white with handmade vinyl decals. You can do that for your dining room, too!
  • If you want to transform your outdoor centerpiece, use mini pumpkins that are hollowed out and punched with holes to make dramatic lanterns, like in this patio.
Milan Stoneworks wishes you a Happy Halloween (in advance). We’re as excited as you are! In the meantime, leave us some candy corns, wormy burgers, or blood colored cocktails.

Tuesday, October 8, 2013

Fall Maintenance Tips for Your Home


As the leaves change and the days get shorter, you have to make sure your home is ready to handle the cold weather. In order to keep your home running smoothly and to avoid costly repairs later, it’s time to start thinking about seasonal maintenance.


Schedule a tune up with a technician. Just as a tune-up for your car can improve your gas mileage, a scheduled tune-up for your heating system can provide efficiency and comfort. They will ensure there’s no leakage so you’re not stuck with a broken heater.


Reverse the air. This is also the time to reverse ceiling fans. Doing this will help to circulate the hot air, distributing the heat more evenly and cutting down the need to turn up the heater.


Change the filters in your home. If you have a central air conditioning system, make sure you have changed your air filter. For a wall air conditioning unit, you can place a waterproof cover over it to prevent damage.


Fill in the gaps: Check your windows for any leaks that may compromise heating efficiency and ensure the seal and caulking around the frame is in good condition. Purchase a plastic sealing from the hardware store if you feel cold air coming in and place it around the window to keep the heat from escaping. Don’t forget to check your doors too, and fix their weather-stripping.


Prepare your fireplace. Some people prefer to use their fireplace than the central heater during fall and winter days. To allow the air to move freely through the chimney, discard old ashes and make sure the damper is open. If you feel the air is becoming cold, close the damper immediately after cleaning. The handle and springs should be working properly. If necessary, you can hire a professional chimney sweep.


Check the roof for leaks and clean the gutters. Carefully inspect your roof for any missing or broken tiles to prevent damage when it rains. The flashing around your chimney and any openings in the roof should be free from any leakage problems. Make sure to clear gutters from leaves, dirt, and pine needles and check downspouts for damage or loose pieces.


Yard maintenance. Trim trees and bushes away from the house. Rake the leaves into piles and dispose them properly. Drain outdoor faucets, garden hoses and sprinkler systems.


Are there other tasks you incorporate into your fall schedule? Share it with us below!

Tuesday, September 17, 2013

7 Fall-Inspired Ways to Decorate Your Fireplace


They say the kitchen is the heart of the home, but when the temperature is dropping along with the leaves, the fireplace becomes a contender. Autumn brings cozy thoughts and makes you turn to the warmth and comfort of a roaring fire. If you’re in the mood for a change, it would be fun to get inspired with these festive fireplace decorating ideas:
  • The simplest way to decorate a fireplace mantel is to place pumpkins, wreath, and candles creatively.

  • A vintage touch is popular and carries intense fall colors. You can add a board with your favorite quote written on it.

  • Use rustic and nature-inspired theme that screams autumn and other antique goodies. For an instance, you can use giant acorn, yarn wreath, and other antique goodies.

  • Be more imaginative and expand your horizons to the entire living room to bring out a seasonal spark. Warm draperies and a blanket over the arm chair are a great addition.


  • If you’re not a fan of traditional décor, you can appreciate the beauty in the minimal details. You can use glass vases and other items that compliment the fall hues.


  • One of the joys of autumn is sitting around a fire roasting marshmallows and sipping cider. But you don’t have to camp out to do that. You can transform your backyard and deck into a cozy haven.
Have you started decorating for autumn? What were your favorite features in these great outdoor spaces? Share it with us!

Tuesday, September 3, 2013

Design Ideas: 5 Most Popular Kitchen Layouts


Whether you’re designing a brand new kitchen or remodeling an old one, a solid floor plan is the key to a well-functioning space. The first thing to consider is the layout of the kitchen, the shape made by the arrangement of appliances, storage, sink, and countertop. This creates a work triangle – the path formed by the sink, cooktop, and refrigerator.


There are five main kitchen layouts: single, galley, U, G, and L-shaped. Each kitchen can be enhanced with the right accents.


Single Wall. Others love this kind of layout because of its simplicity. Also known as the I-shaped kitchen, this is ideal for small apartments and open lofts.                                                       

Galley. Just like the I-shaped kitchen, this is an efficient and simple pattern but more flexible for modern lifestyles. The work stations face each other in parallel walls. Some homeowners take out the walls to add a table and seating or create a stack storage to maximize the space.

U-shaped. This is the most versatile layout for kitchens of all sizes. For larger kitchens, an island is usually added.

G-shaped. A variation of the U-shaped, it links the kitchen to the dining area with a common counter surface. You can add a small island but a peninsula is a better choice.


L-shaped. This layout is created on two adjacent walls, fits almost any style, and provides an efficient work area making it popular in today’s multi-purpose kitchens.
Now that you’ve seen the options available, you can create a kitchen plan that works for you, your family, and your changing needs.
Tell us: What type of kitchen layout do you plan on using?

Tuesday, August 20, 2013

Build a Wine Cellar You Can Be Proud Of


Do you keep a wine chilling in the fridge or leave bottles stacked on the counter? If not, then you are a true wine enthusiast. You know that everything about wine is an art - from making it to packaging, and storing it. Whether you are a wine newbie or a seasoned connoisseur, these tips and design ideas will help you showcase your growing wine collection.

Make use of the space you have. No matter how big or small, a carefully selected location can unleash the connoisseur inside you. This is the most important aspect to consider when building a wine cellar. Basements or a corner space that has no direct sunlight are recommended. When selecting a location, you should understand the basics. A properly built wine cellar will make the space functional and appealing.

Control the climate. Install a wine cooling unit that also controls humidity and removes excess moisture. There are many products available in the market today from the simple through-wall unit to a wine-room specific HVAC system.

Ensure proper insulation. Interior designer Mark Cravotta of Cravotta Studios recommends treating the shell by creating a moisture barrier on the outside of every wall plus the floor and the ceiling, as well as adding closed-cell foam insulation to prevent condensation buildup and mold.

Choose proper lighting. You can make storing wine truly an art with the lights on. The type of light you choose will not only protect your wines from exposure to excessive heat but also create a stunning effect. LED lighting is a great choice over the normal incadescents and halogen bulbs. LEDs can give emphasis on arches and add a comforting glow to the display racking and are widely-used because of its energy efficiency, low-heat emissions and versatility. Having LED based wine room lights can be pretty expensive but because of the amazing life span, you will save money in the long run.

Don’t forget the doorway seal. Consider the need to create a seal in the doorway. Glass doors allow the best viewing into your wine cellar. To ensure optimal wine cellar sealing, an insulated door equipped with weather-stripping is recommended, such as an exterior-grade, insulated door or a dual paned glass.

Consider a tracking system. For those who have larger collections, a tracking system will assist you with your wine inventory. There are easy-to-use wine management software programs available today and they make wine cellar management a lot more fun.

Create an artful storage. The secret to a classy wine cellar is how you store and display your wine. Before storing your bottles, decide how you want to admire your collection. Do you prefer a custom racking system or a bulk storage and display? Or maybe you want something that fits your budget like ready-made metal or pine racks? Keep in mind that the best cellar showcases the finest wines while allowing you to enjoy the pleasant aura.


If you are interested in building a wine cellar that meets your standards, we are happy to help. Contact Milan Stoneworks today!

Tuesday, August 6, 2013

4 Easy Household Fixes Anyone Can Do


There’s nothing worse than waking up to a room with ceiling leaks or some other home catastrophe. You end up thinking that it could have been prevented. If your next step is calling a handyman, think again. Taking a few tweaks all by yourself can save you from unnecessary expenses on minor home repairs.

Little fixes can keep things in best condition. Thomas Mollidor, owner and president of UpKeepers, tackles the most common household problems and how to address them before they become more of a hassle.

Clogged garbage disposal. While there are many reasons for a garbage disposal breaking, a simple reset can fix it. The reset button is located underneath the disposal. If the blades of your garbage disposer won’t turn, you can manually turn the blades with the tool supplied by the manufacturer. If you look closely, it resembles a hex wrench.

HVAC, air conditioner, and furnace malfunction. When a heating or cooling system malfunctions, the heat/cold source, distribution system, or thermostat may be causing the problem. The easiest thing you can do is to flip back the breaker if you noticed that it has thrown on your electrical panel.

You can also turn off your thermostat and HVAC unit. Wait for three minutes and then switch your thermostat back to heat or cool and also flip the switch on your HVAC unit to “on.” This resets the system.

Broken electrical outlet. First, see if other outlets are dead. Check the circuit breakers, GFCIs, and loose outlets. The fix for a dead outlet is usually simpler than you think. Just hit the reset button located on the outlet. This can save the cost of a service call.

Ceiling leak. Small roof leaks can be tough to locate. You can track down and fix the common types of leaks with a tissue paper. Tape two to three sections of tissue paper lightly to the ceiling then observe when the tissue gets wet and when it happened. Most of the time water runs to openings in the vapor barrier, such as at ceiling light fixtures. You may have to stop using one of these fixtures temporarily and see which one is causing the leak.

Remember to follow safety precautions when performing any repairs. Do you have a story of do-it-yourself success? Share it with us!

Tuesday, July 16, 2013

Selecting the Right Material For Your Kitchen Sink


The kitchen sink should be a working space without restrictions. It requires functionality and a great design element. Here’s a roundup of kitchen sink materials to help narrow your search and keep you updated with the ever changing design market.

Stainless Steel. Stainless steels are the most popular on the market today. They can be used on both undermount and top mount sinks. They are inexpensive, durable, and resistant to cracking, chipping, and peeling. If you have a limited budget, this material is a perfect fit for your kitchen. The inside finish is also important. A satin texture offers longer protection from scratching with normal use.

Cast Iron. This type of material can add a vintage appeal to your kitchen. The smooth, glass finish is very easy to clean and suited for daily wear and tear. This type of material is heavy and can be more expensive than stainless steel.

Composite. Composite sinks are available in quartz composite, polyester/acrylic, and granite-based. They are tough and highly resistant to scratching.

Fireclay. Fireclay sinks offer a wide variety of elegant styles but are most commonly seen on farmhouse or apron sink. The most common shapes are deep square and rectangular bowls. They fall under the expensive end but can be a great investment as they are non-porous, won’t rust or discolor, and can withstand heat.

Enjoy a Great Choice of Sinks. Glass, marble, copper, solid surface/acrylic, and tiles are also being used to make kitchen sinks. You can even add a personal flair by selecting a hand-painted sink. And if you are on a tight budget, you can buy a repurposed sink that can give your kitchen a new look.

When selecting a kitchen sink, make sure it complements your countertop, décor, and theme, and fits perfectly with other furnishings in the room. The ideal sink will not only make you feel great when you use it but will also make life easier and help you make the most out of your kitchen.


Contact Milan Stoneworks today! We can help you design and layout your next kitchen remodeling project.

Tuesday, July 2, 2013

7 Stylish Sinks for a Beautiful Kitchen


Gone are the days when homeowners had only two choices for a kitchen sink. With so many options to choose from – single bowls to multiple bowls of different shapes and sizes - finding your ideal sink these days can become overwhelming.

The kitchen is the heart of your home but if your heart demands for stylish trends, you should focus on both style and functionality. Knowing all your options will help you determine which style, color, and material is best for your kitchen worktop.

So how do you become a smart sink shopper? This guide will help you get over that ‘sinking’ feeling so you can enjoy a classy yet very practical sink that’s sure to turn your kitchen into your very own oasis.

Single Bowl. This type of basin usually comes in compact sizes, making them ideal for those who have limited spaces and use a lot of large pots and pans. It allows the flexibility of washing larger items with ease and is commonly seen as a bar sink or a second sink on the kitchen island.

Double Bowl. You can select two equally-sized bowls of the same size or one can be larger than the other. The right setup depends on what you do in the kitchen and this particular type will allow more than one person to be at the sink. It is very versatile, for example, you can wash or dry the dishes on one side while doing food preparation on the other side.

Farmhouse/apron. Apron sinks usually have one large bowl and exposed front panel but they are also available in single or double basin variety. The unique design works best in a country style décor and may need custom cabinetry.

Top mount. A top-mount sink is designed to be installed on top of a countertop. This means that a portion of the sink called the lip, overlaps the countertop to give a covered edge. This type of sink is cost-effective since it requires less labor to install and at the same time, it offers wiggle room for under-sink storage. Regular cleaning is important as the lip is exposed atop and crevices may trap dirt and debris.

Undermount. Unlike a top mount sink, undermount sinks don’t have crevices and grooves where debris can accumulate. You can easily wipe straight into the sink. While it provides a clean, modern look, one drawback is the cost. Undermount models usually require more work to install, for an instance; you’ll need to cut holes into your countertop as they are not designed with space for faucets and attachments.

Custom. Get creative when designing your kitchen. If you want a counter in front of a floor-to-ceiling window, opt for a floating sink. The latest sink models are available in different shapes allowing you to design your own picture perfect sink.

Fully integrated. A sink connected directly to your countertop will blend seamlessly into your kitchen design. These sinks are easy to care with no lip to trap dirt. However, some materials can be pretty expensive. These can be done with Quartz Engineered sinks, solid surface, and stainless steel.

Did you love these innovative designs? Tell us which style works best for you!

Tuesday, June 4, 2013

Kitchen Island Designs for Small Spaces


If your kitchen isn’t huge enough and you want to maximize your cooking prep area and storage, a small island can be a functional and beautiful solution. It has become the most sought-after element in every kitchen.

When fitting an island into a small kitchen, you’ll want to consider the shape and design, access of pets and children, and what you want to store and display in that space. For example, you can add a small prep sink into the island without having to disturb someone else working at the stove. Maybe you want it equipped with under-the-counter appliances. 

Picking a small island also means you can be daring with your choice of material or color. These gorgeous kitchen ideas will help you find the perfect fit:
  • Consider a square island if it suits your space. A great idea will be to integrate a mix of small and large drawers, an open shelf for storing larger items like platters, or baskets for storing root vegetables. 
  • You can add a nice piece of cabinetry with beautifully executed corner posts and a furniture-style toe kick to store a microwave or a mini fridge underneath. 
  • Add a towel bar or some hooks to one side and maximize its usefulness.
  • This is a simple yet very effective way to organize your stuff in the kitchen. 
  • Opt for a handy cabinet with drawers where you can keep cookbooks and other food-related items. You could also look for square cubbies that serve as storage for fruits or wine bottles. 
  • Add seats with appropriate height to create a modern look. Allow at least 2 feet of width per chair for comfortable seating. 
  • Aside from the standard shape, you can also try something different, for example, opt for a charming little round island instead of the traditional rectangle or square. 
Got any ideas on how to utilize an open space in the kitchen? Leave your comments below.